BUILD A SCREENPRINTING SCREEN WITH NITA & MIKKI
A few weeks ago, when the Framing Britney Spears documentary aired, my friend Micki upcycled the Britney cap I had given her last autumn. I admire everything Micki does, but her genious cap twist (Si apre in una nuova finestra) got me thinking, and I asked her if she and her sister (Si apre in una nuova finestra) were interested in being a guest on my blog this month to present one of their crafting projects.
Short story even shorter: they said yes (yay!) and decided to show you how to screen print at home. With things you have at home.
We decided to split their project into two posts, and here's the first one: learn how to make a screen to print with.
You can either use an empty Tetra Brik /Elopak OR an old small canvas or wooden frame for this. It'll both be explained in this post.
The instructions will both be in German and English. Please don't blame them for the poor translation, but me :)
Once the screen is ready, you can download this cat stencil (Si apre in una nuova finestra) to use it for your print. That part will all be explained in a follow up post.
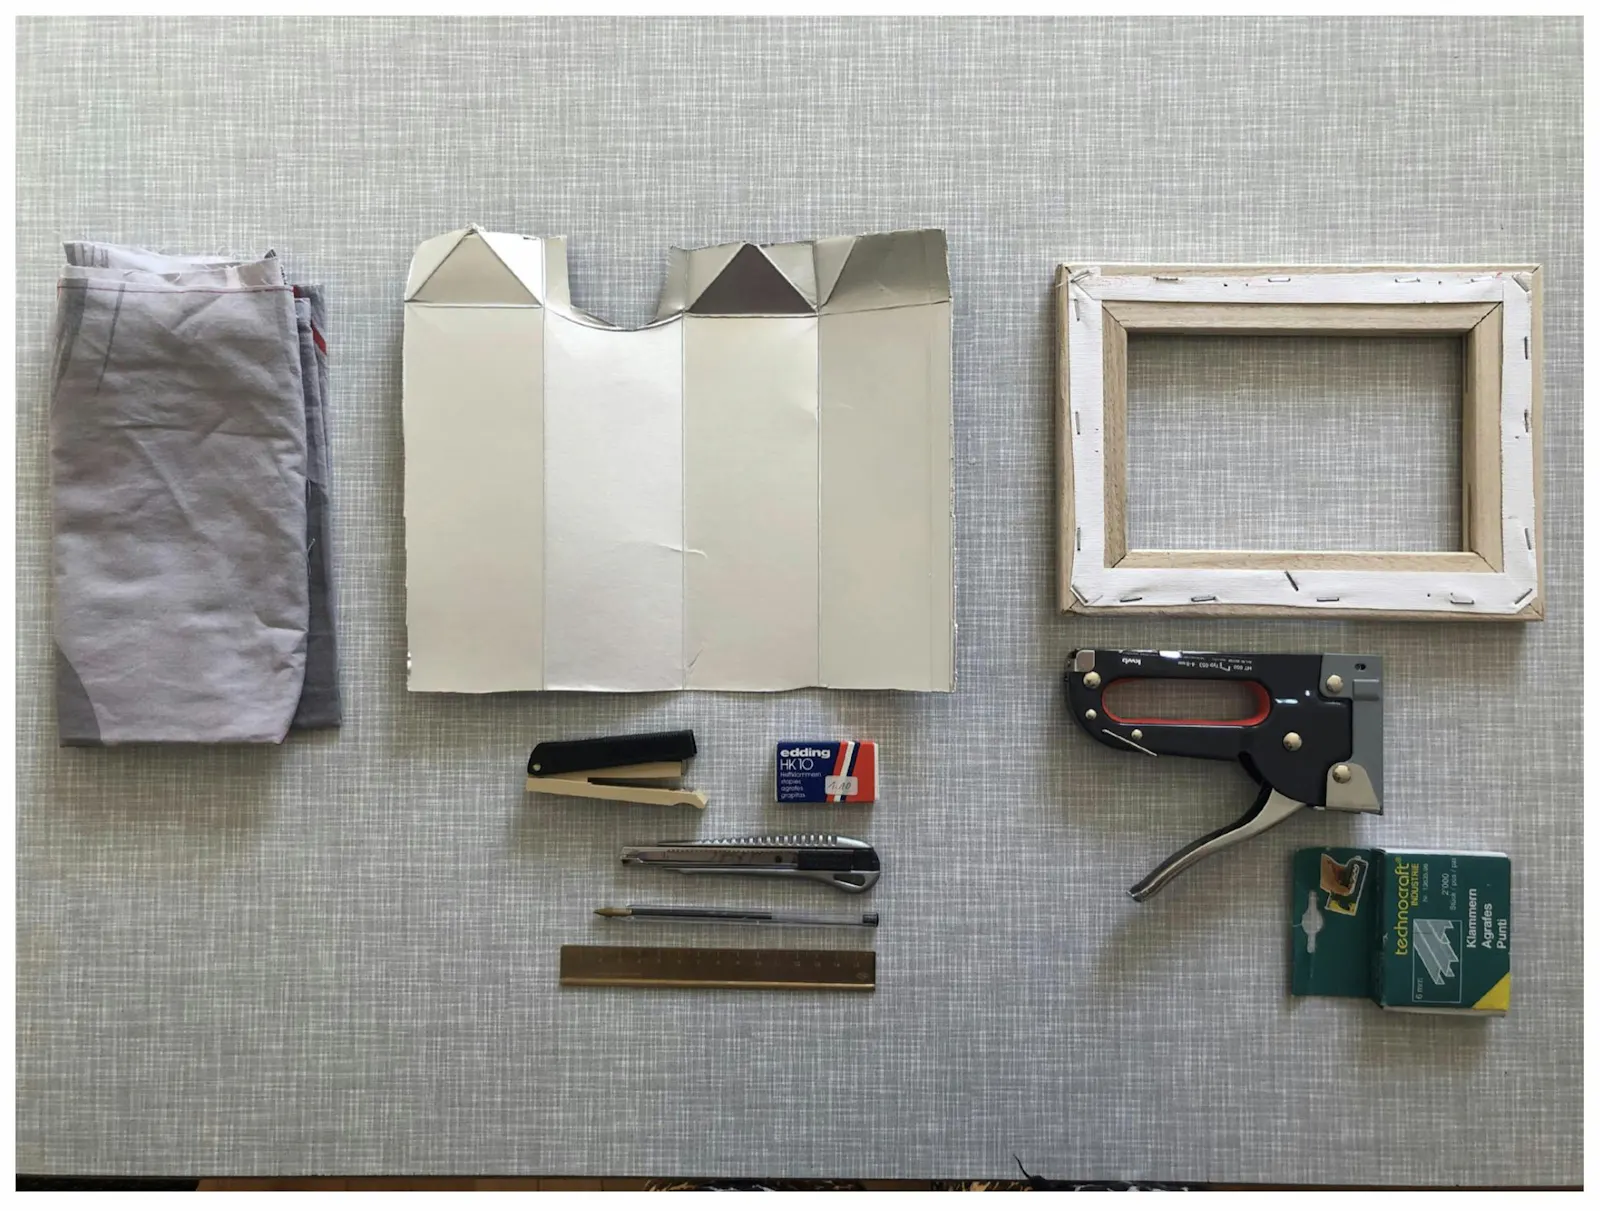
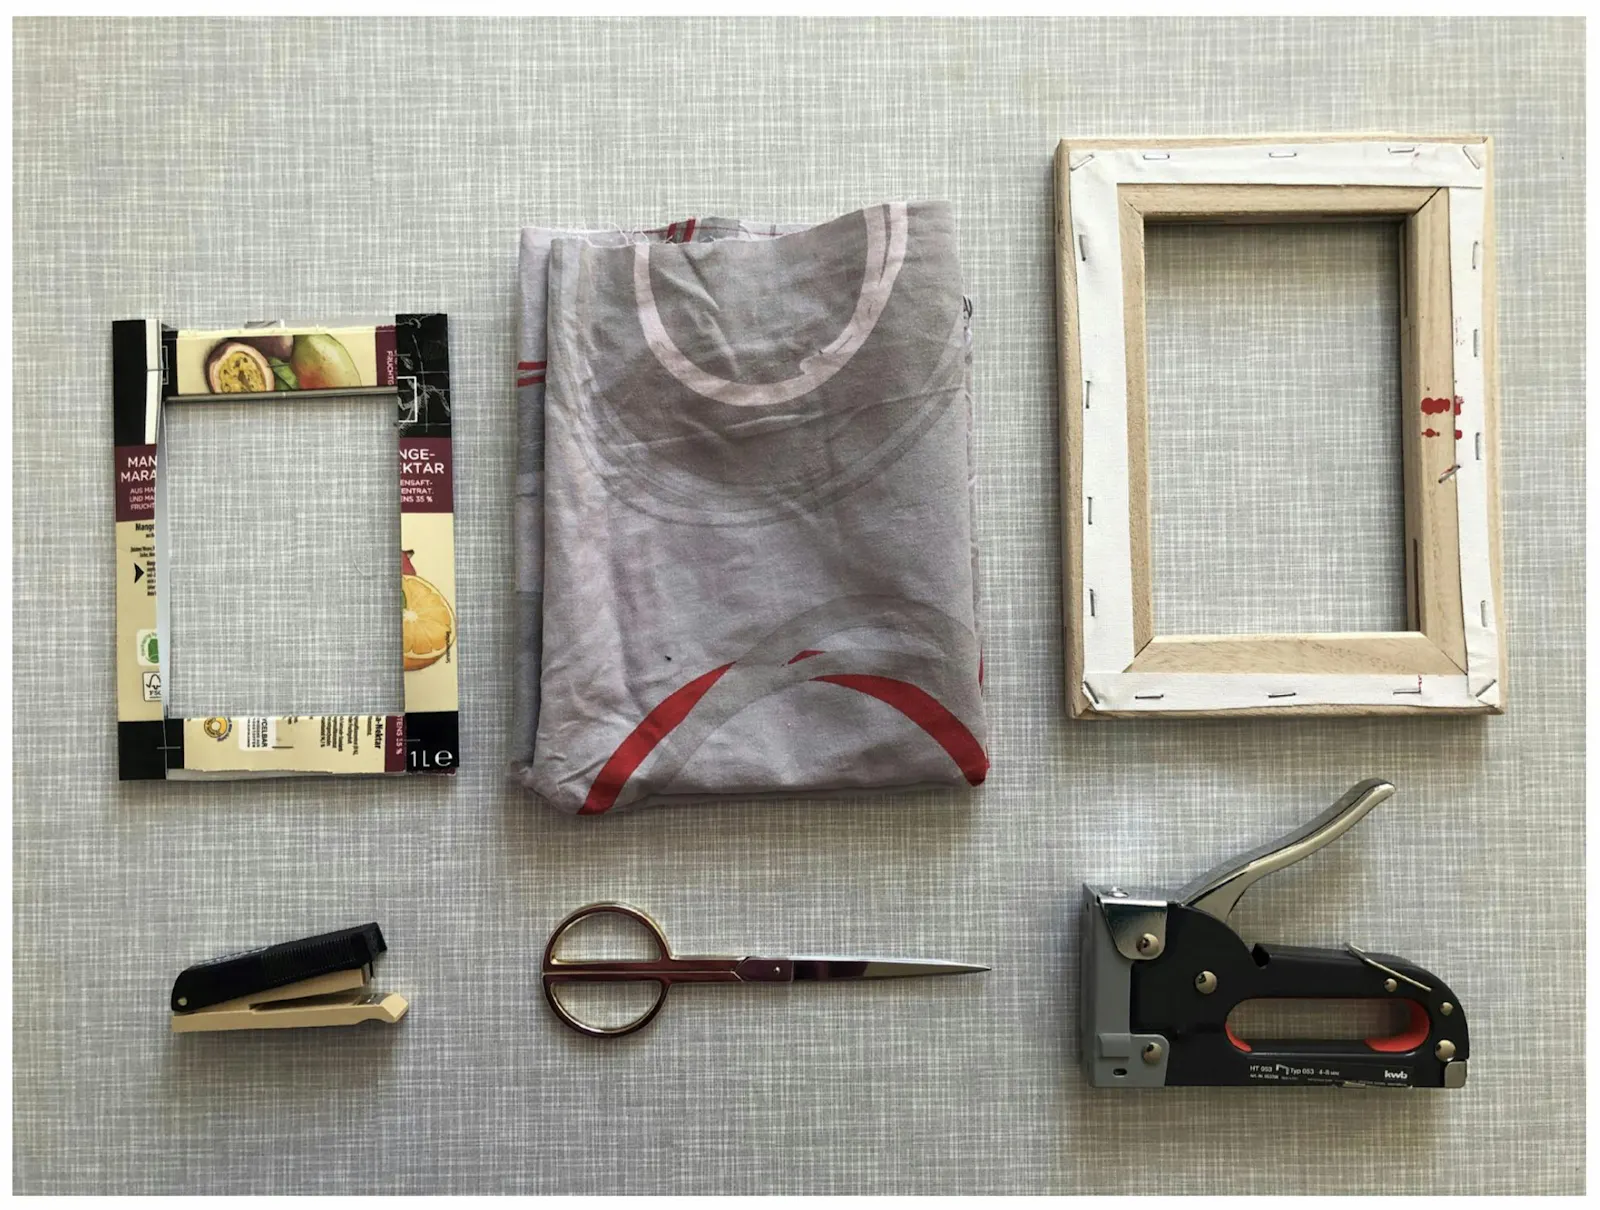
1. You'll need:
a piece of fabric. A thin fabric without stretch material works best! Maybe you have a pair of old cotton pants or bed linen lying around?
For your Elopak sieve: 1 Elopak, a cutter or scissors, a ballpen or sharpie, a ruler, a stapler
For your wooden sieve: a wooden frame and a staple gun
1. Was du brauchst:
Stoff. Am besten funktioniert ein dünner/feiner Baumwollstoff ohne Elasthan, z.B. von einer alten Sommerhose, oder alte Bettwäsche
Für das Elopak Sieb: 1 alte Getränkepackung, Cutter oder Schere, Kugelschreiber oder wasserfester Stift, Lineal, Bürotacker
Für ein Holzrahmensieb: ein Rahmen und ein starker Tacker
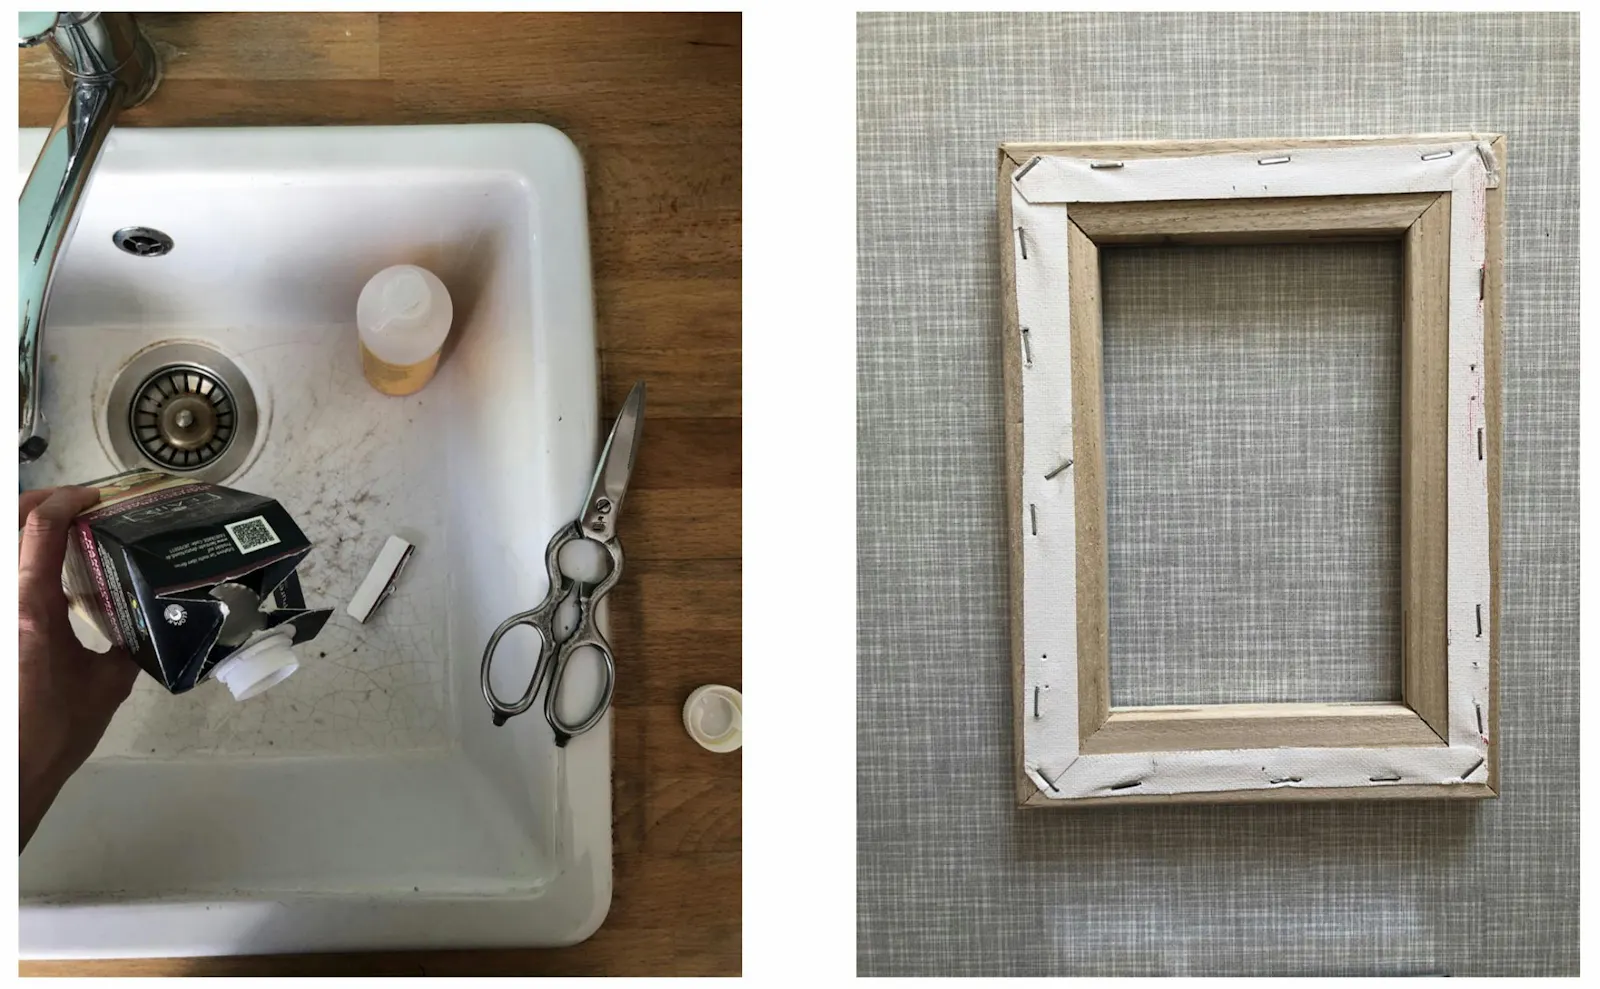
2. Clean your juicebox! OR: cut the canvas off your frame.
2. Tetra Pak reinigen ODER Leintuch vom Holzrahmen schneiden
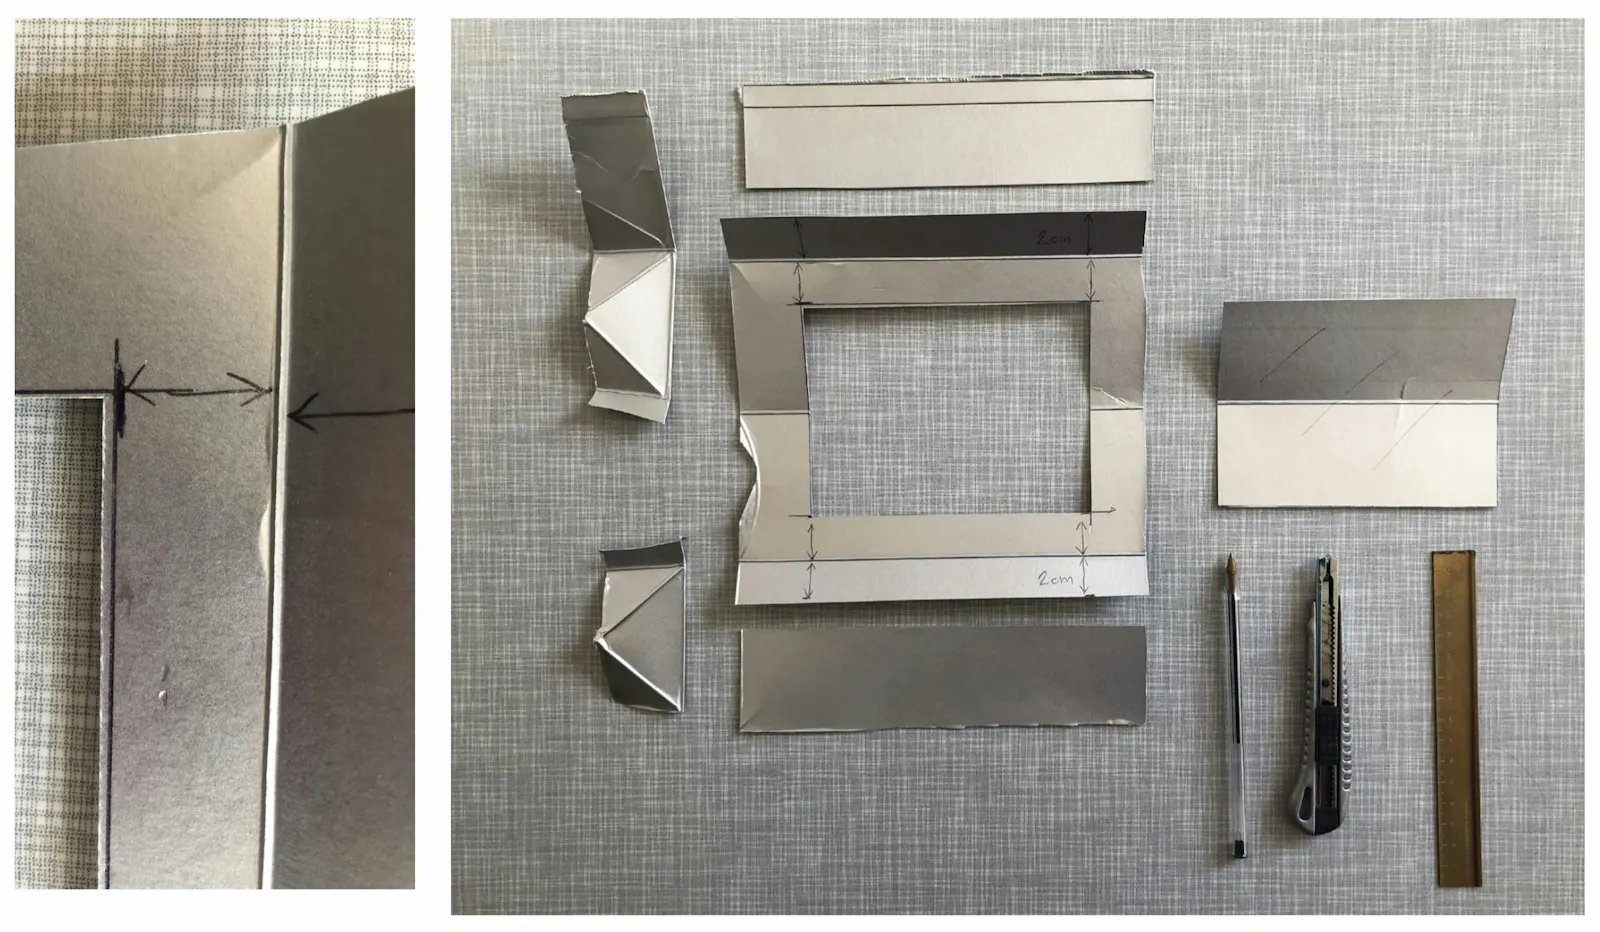
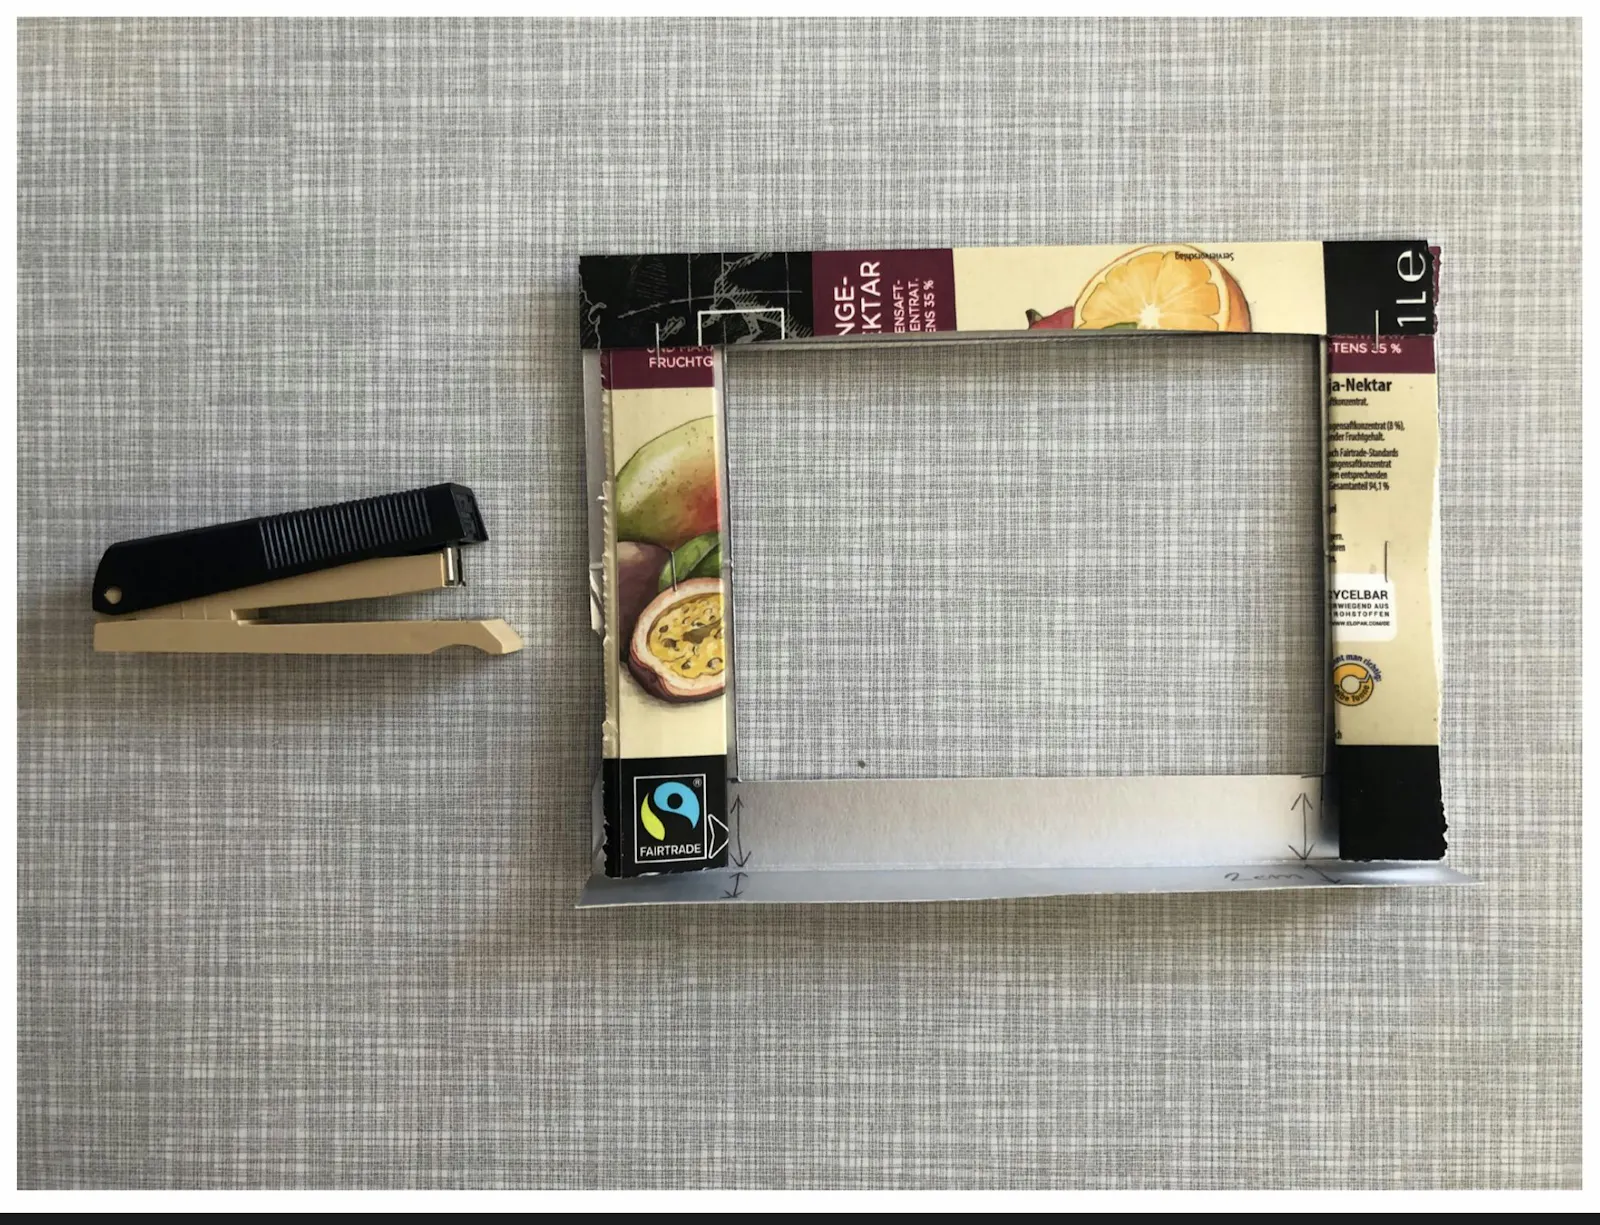
3. Cut the frame:
Cut the juicebox, just as shown in the picture. Make sure to not make the frame too frail. Everything that makes the frame unstable won't work in your favour. Avoid crinkles, build a stable frame, it needs to be resilient enough so you can stretch a fabric on it.
3. Rahmen ausschneiden:
So wie im Bild angezeigt die Teile vom Getränkekarton wegschneiden. Achte darauf, dass du den Rahmen nicht zu schmal schneidest. Alles, was den Rahmen instabil macht ist schlecht. Keine Knicke, keine zu weiten Schnitte, der Rahmen muss etwas Spannung vom Gewebe aushalten.
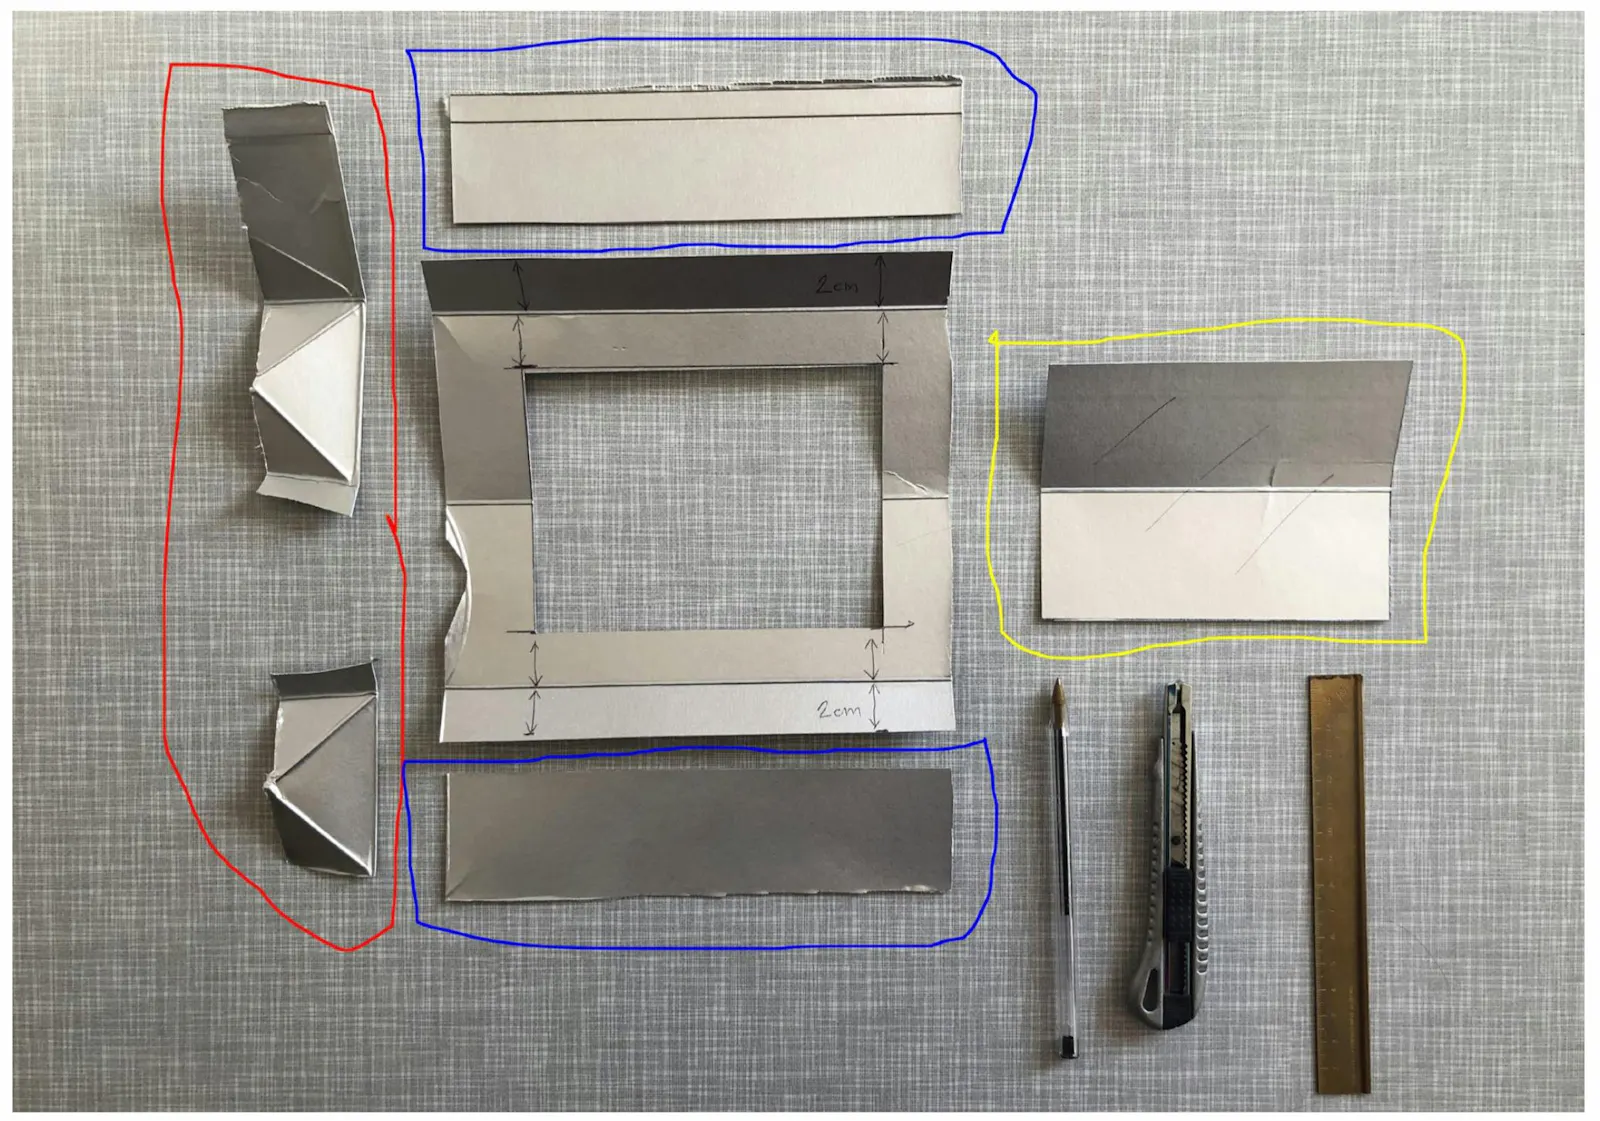
red: get rid of it, we don't need these parts
yellow: keep the part you cut from the middle! You can use it as a squeegee once you start the printing part.
blue: we'll use these parts to stabilize the frame
rot: die geknickten Teile kannst du entsorgen, die brauchst du nicht mehr.
gelb: Den Teil, der aus der Mitte ausgeschnitten wurde, kannst du aufheben, um ihn später als Rakel zu verwenden.
blau: diese Teile verwenden wir zur Stabilisierung des Rahmens.
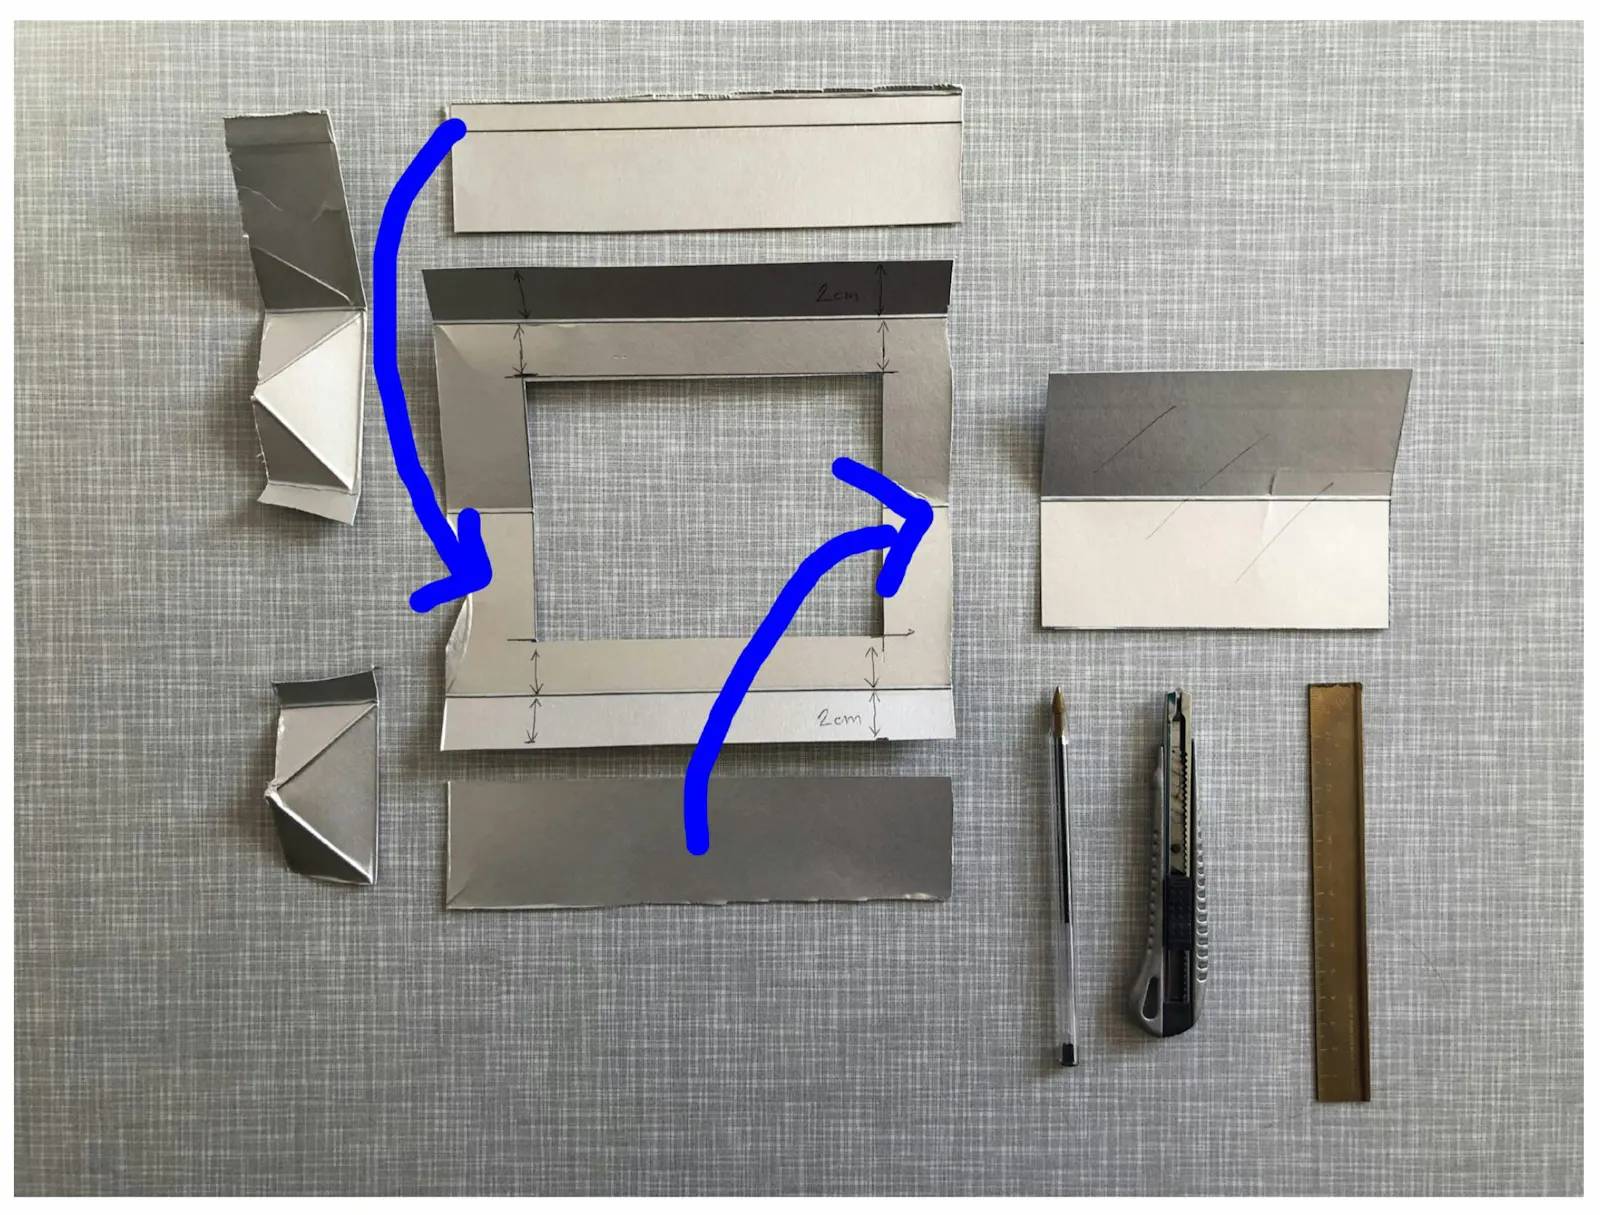
4. blue arrows: stabilize the frame. Shorten these parts, so their lengths match with the sides of the frame.
4. blaue Pfeile: diese Teile verwenden wir, um die Seiten zu stabilisieren. Kürze sie so, dass sie zwischen die Knicke der Packung passen.
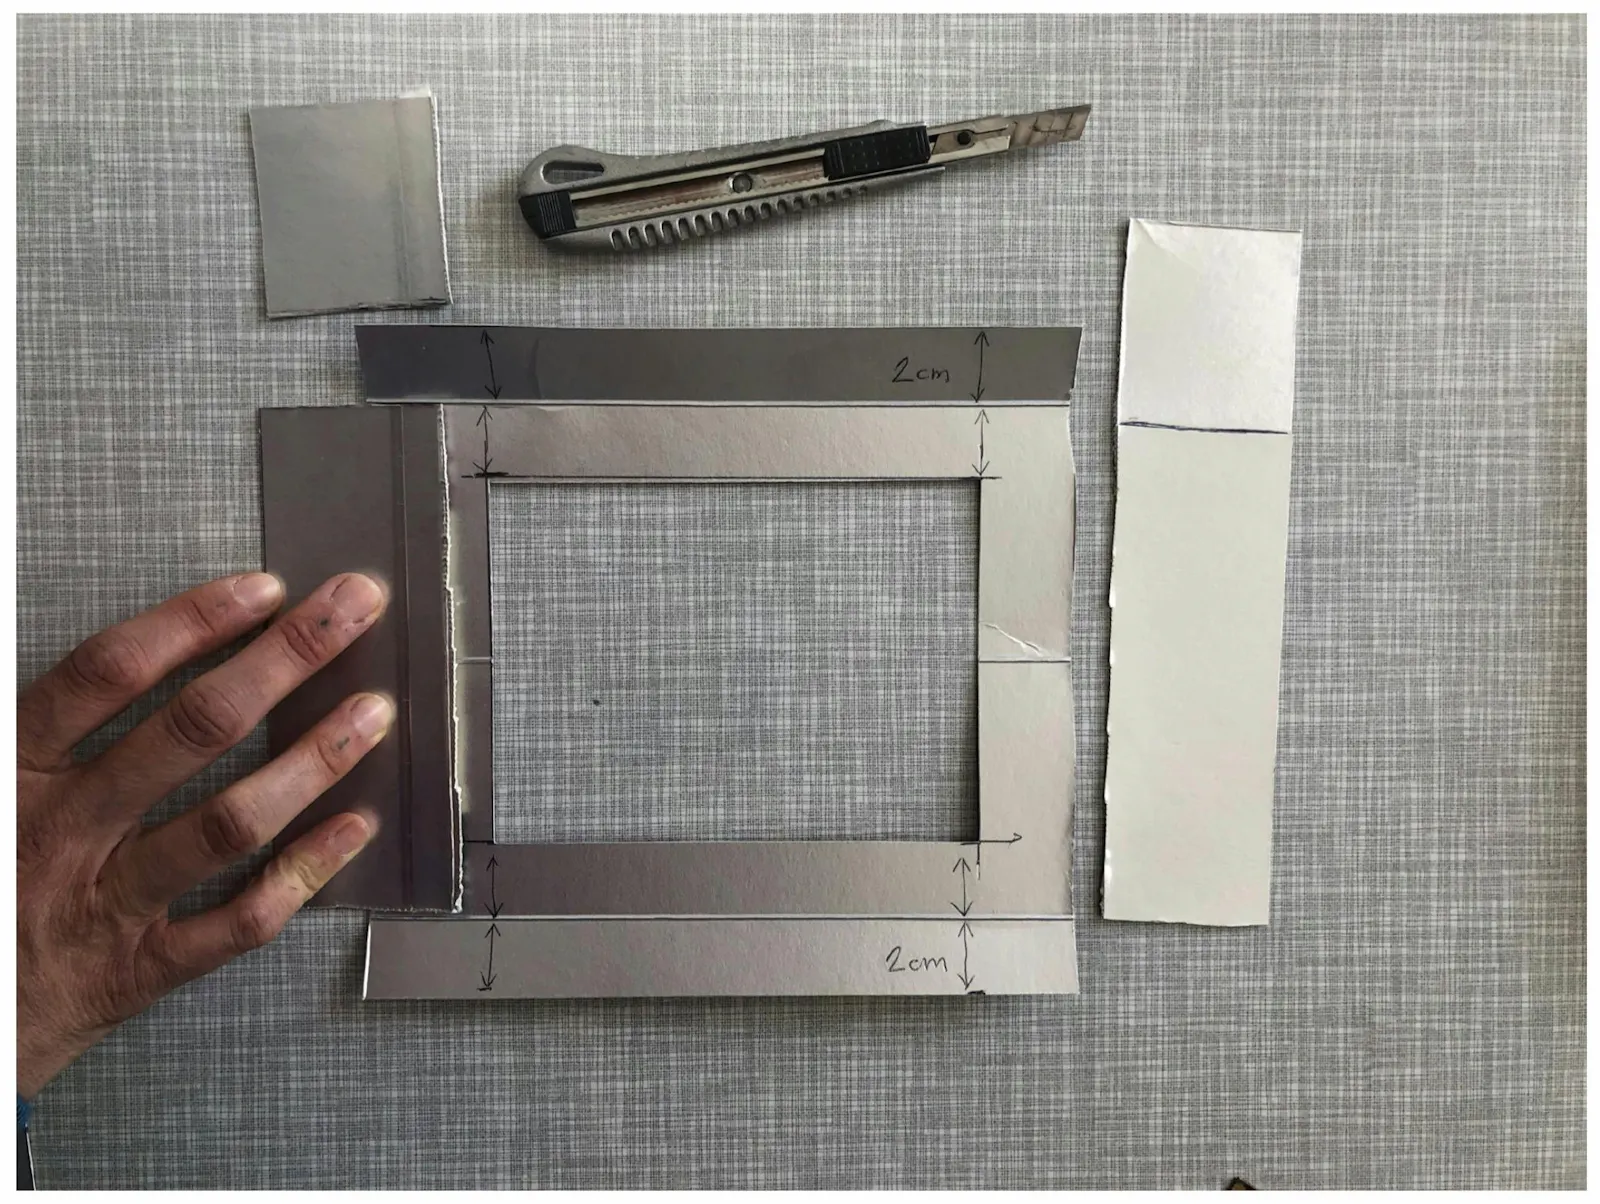
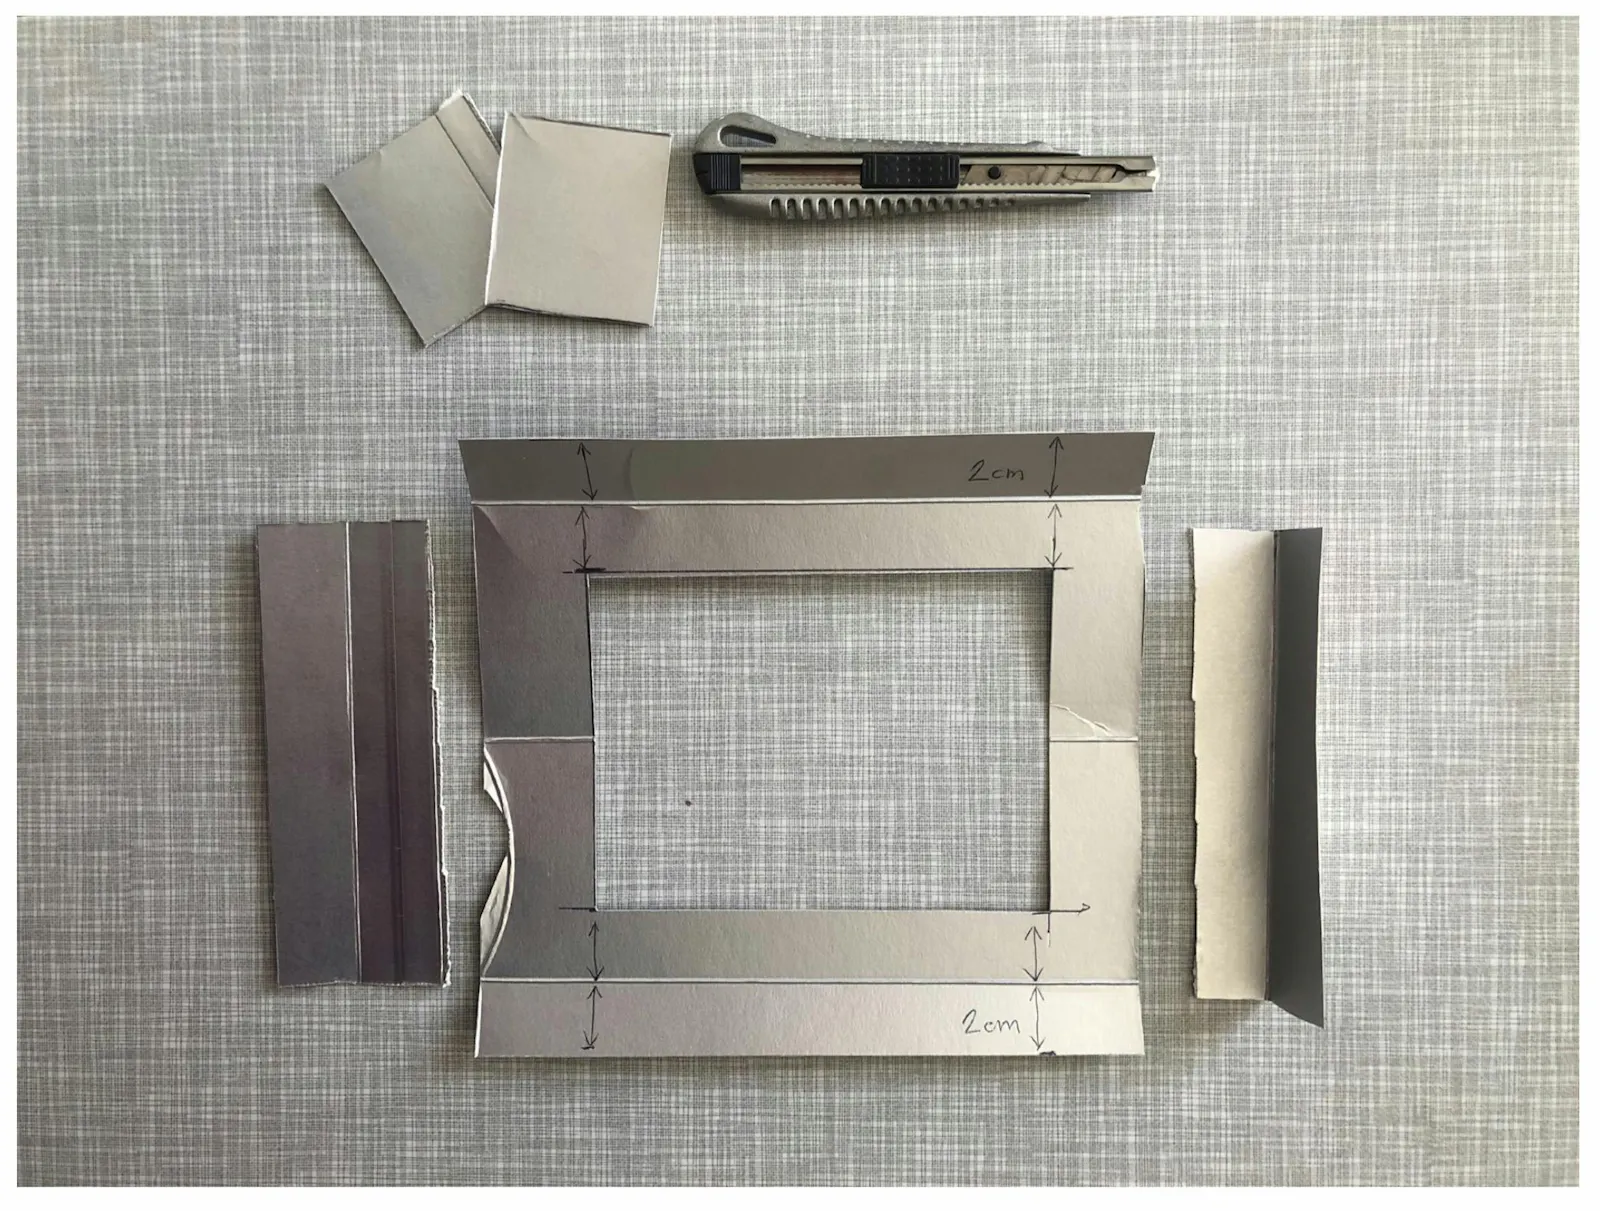
Fold both pieces and staple them to your frame as shown in the pictures.
Falte die beiden Stücke in der Mitte und tackere sie auf beiden Seiten des Rahmens in der Mitte fest.
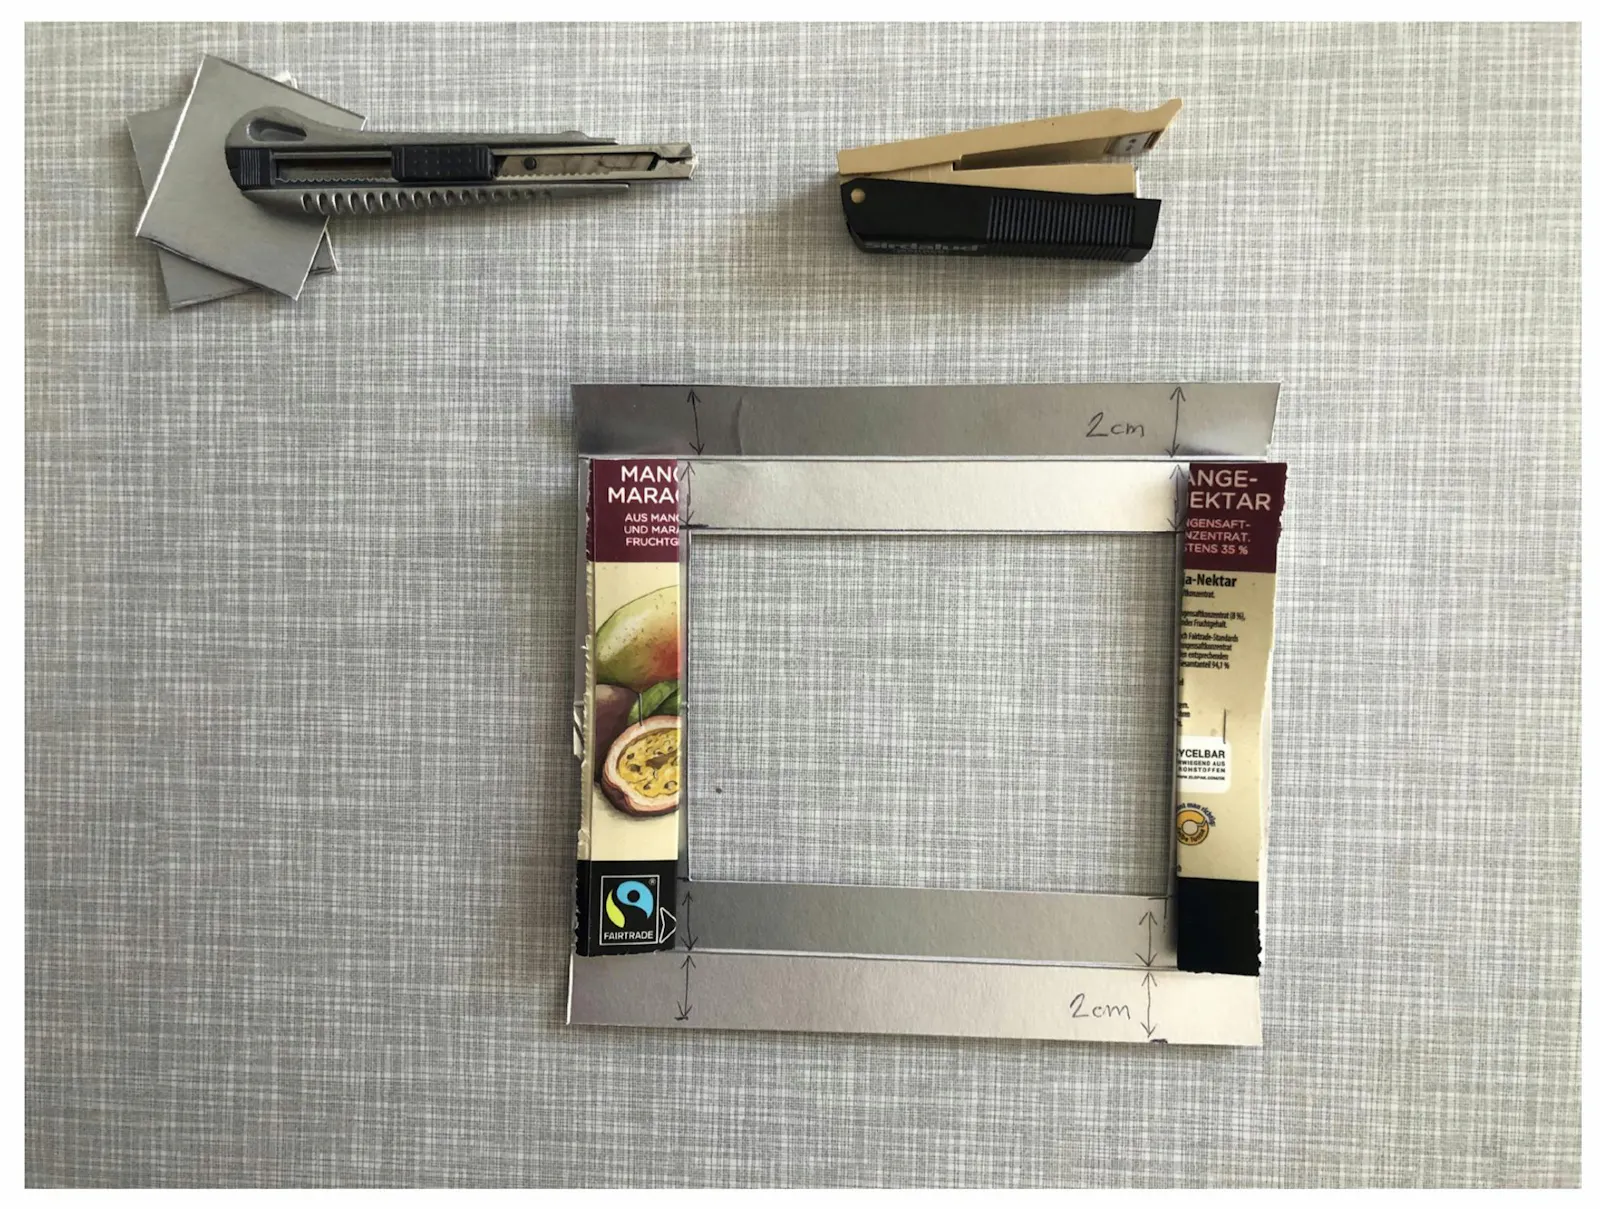
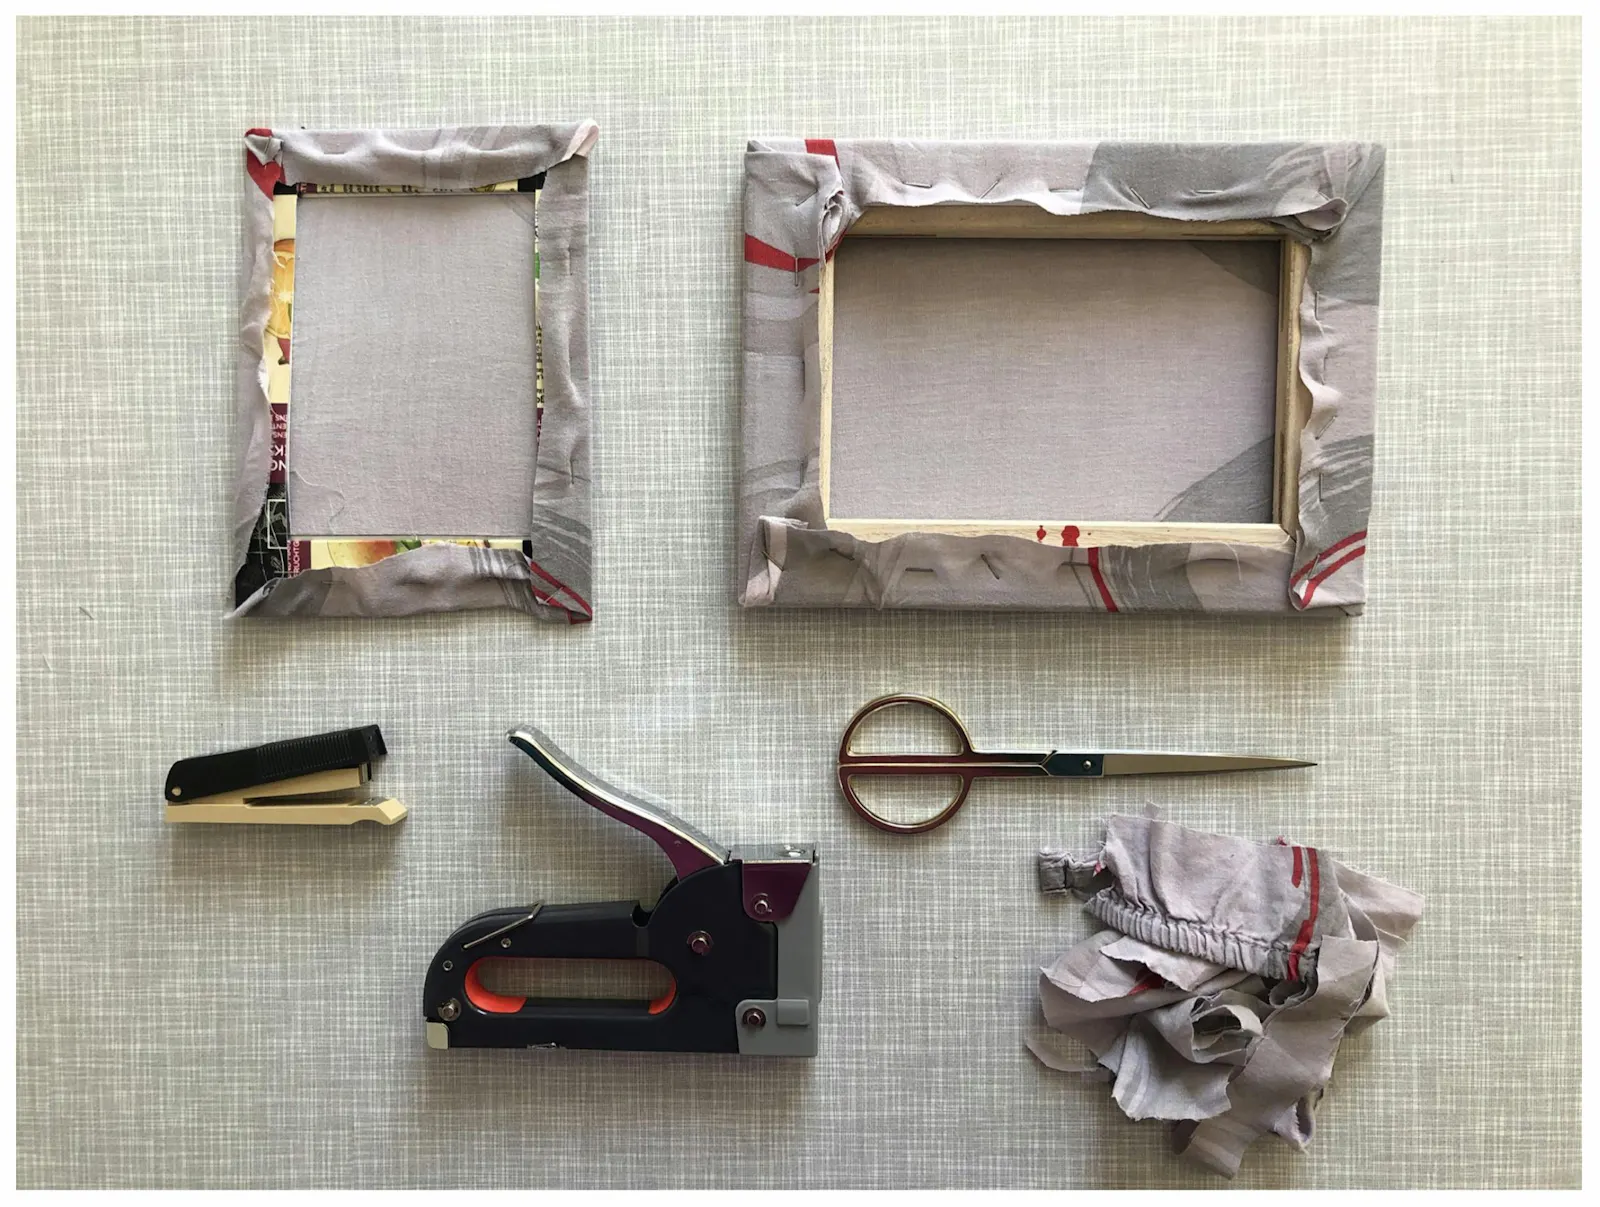
5. Stretch the fabric over your frame.
5. Bespanne deinen Elopak-Rahmen oder Holzrahmen mit Stoff
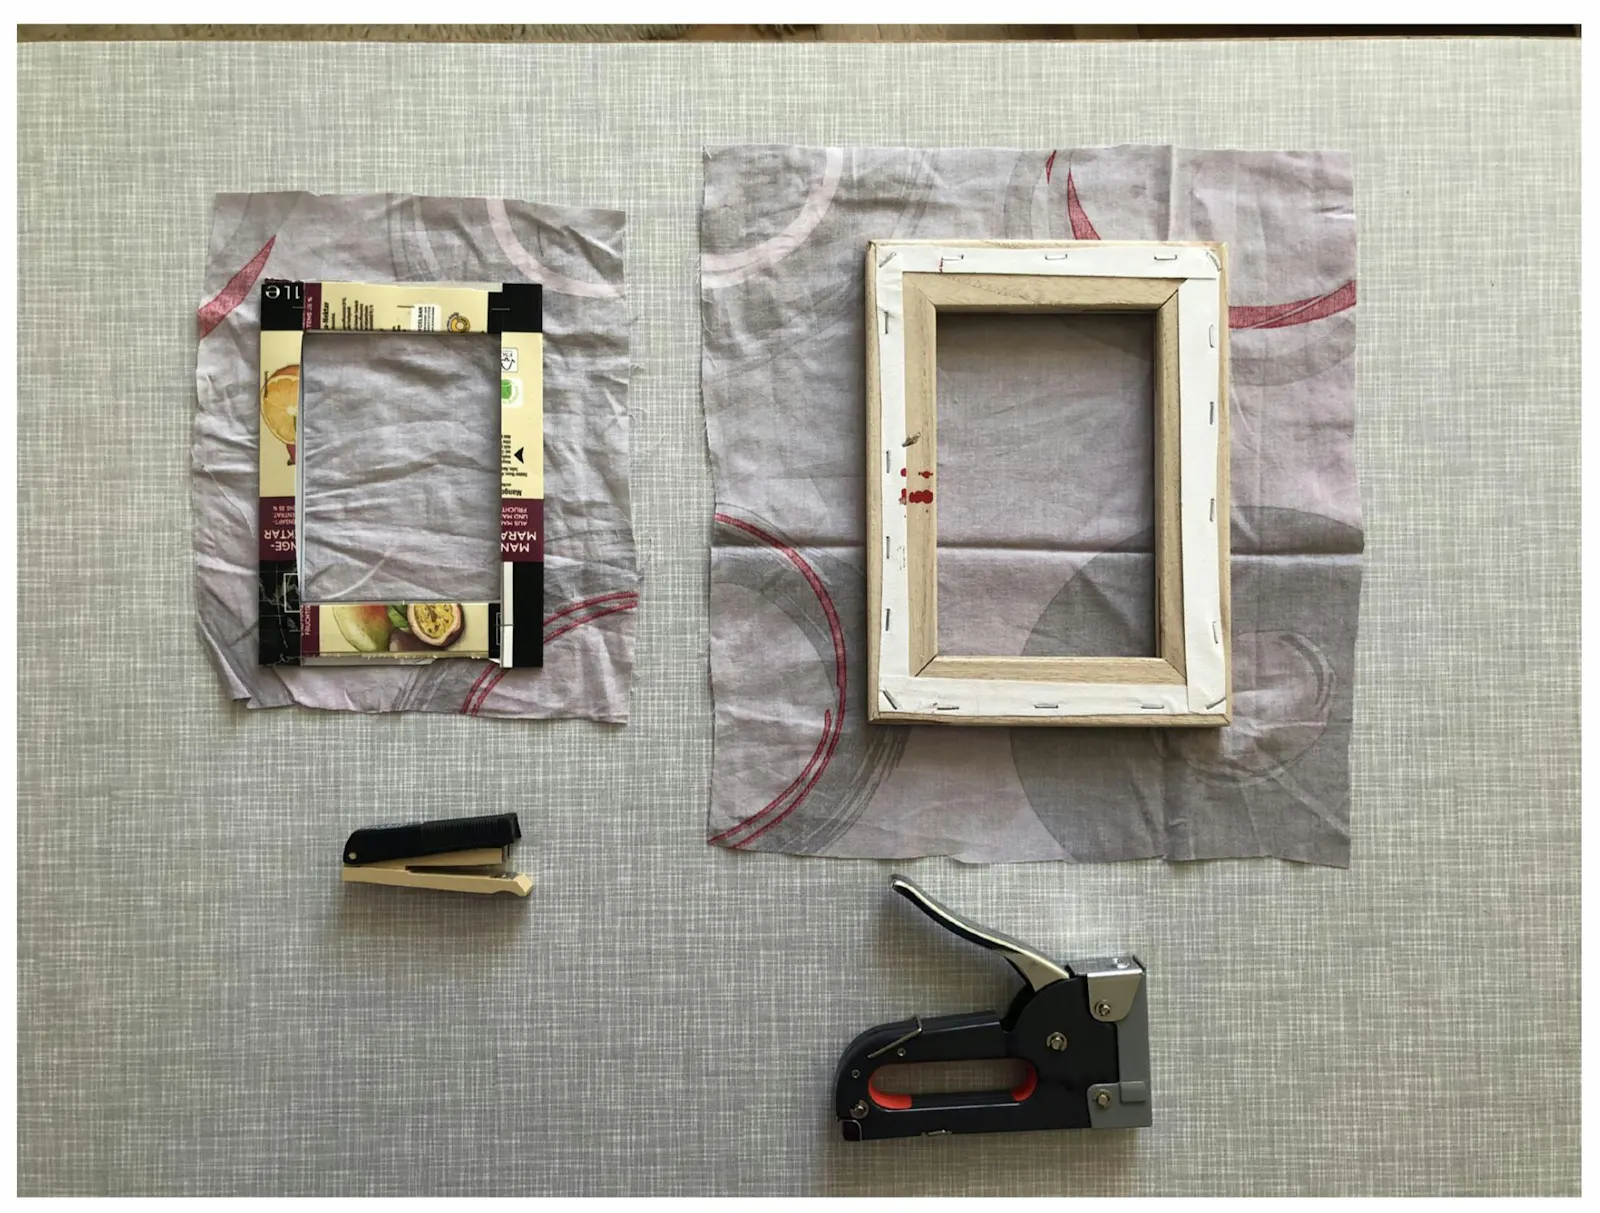
Cut the fabric. Make sure you leave enough overlapping fabric to be able to stretch it properly.
Schneide den Stoff so zurecht, dass du genug überstehendes Material hast, um es festhalten und genug Zug drauf bringen zu können.
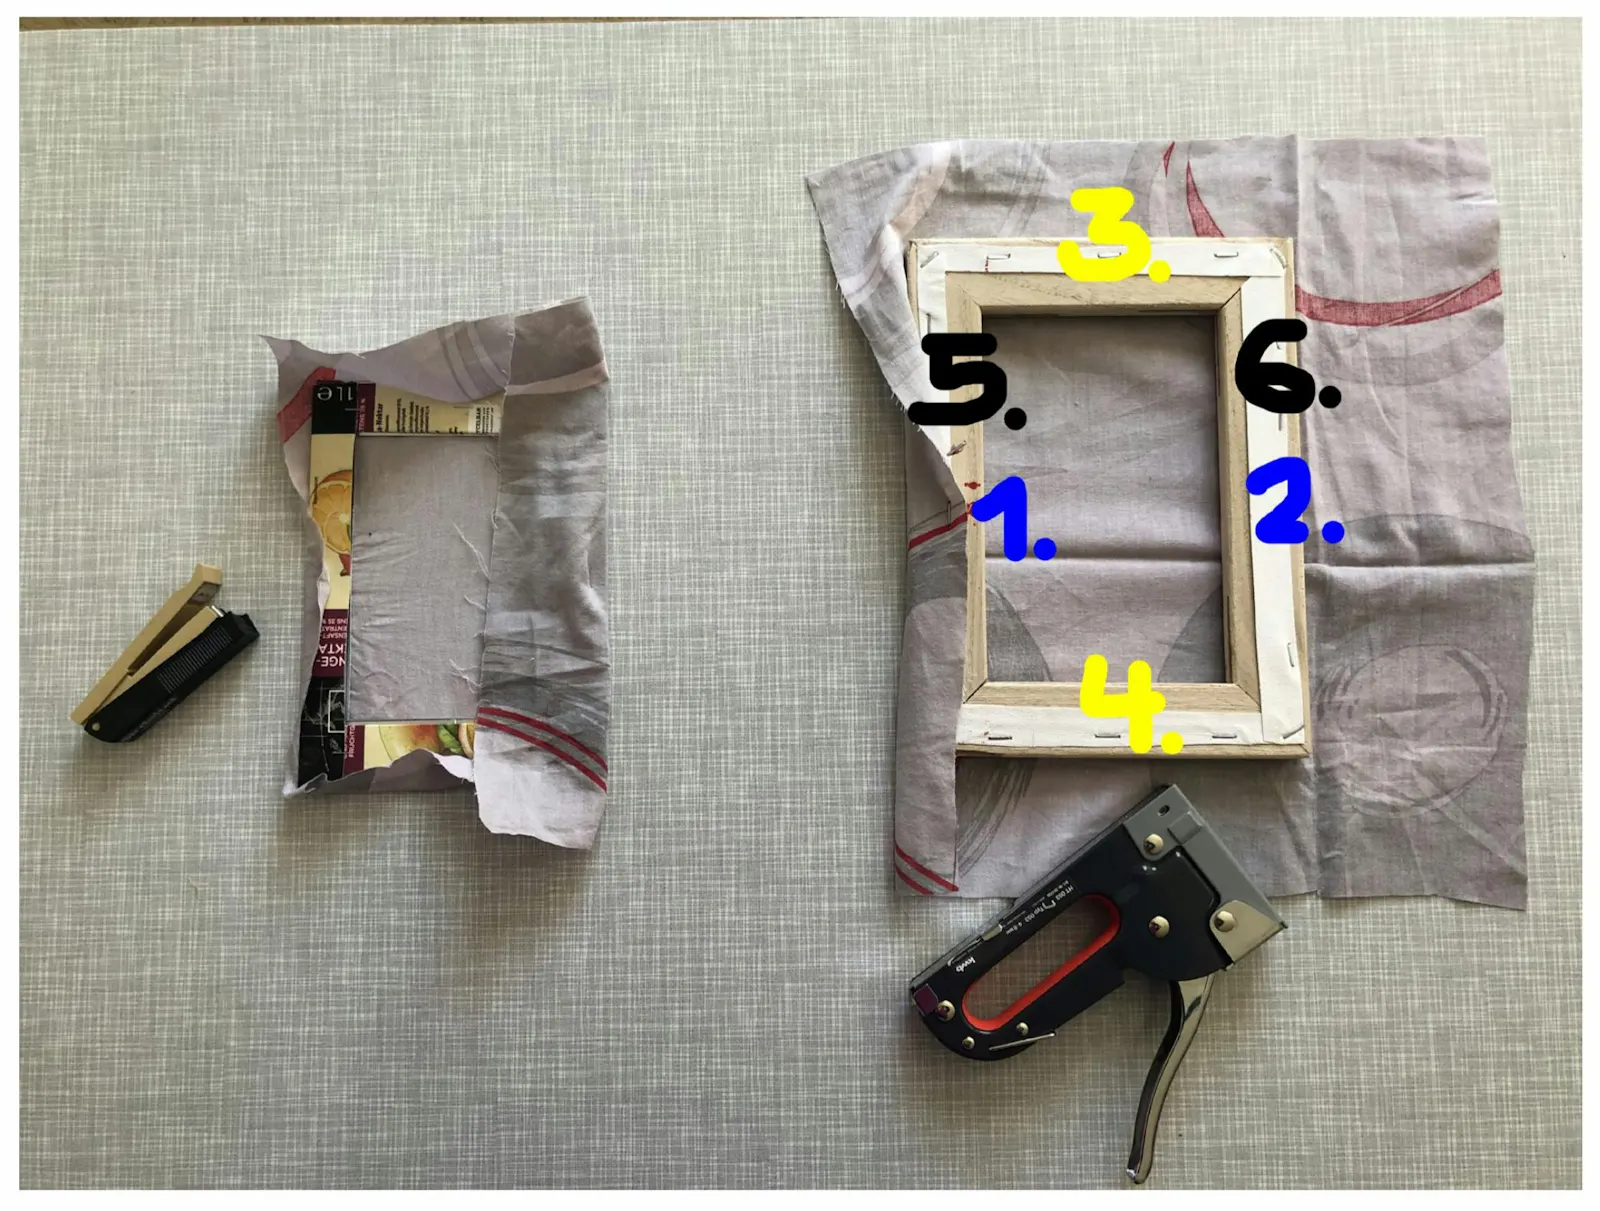
Start stapling in the middle of your frame bars. Staple all four sides equably and work steadily from the middle to the outside corners, to stretch the canvas evenly across the whole frame.
Tackere immer von der Mitte deiner Rahmenseiten ausgehend: zuerst in eine Seite, dann in die gegenüberliegende. Fahre so fort und arbeite dich dabei nach außen vor - so spannst du dein Gewebe gleichmäßig über den ganzen Rahmen.
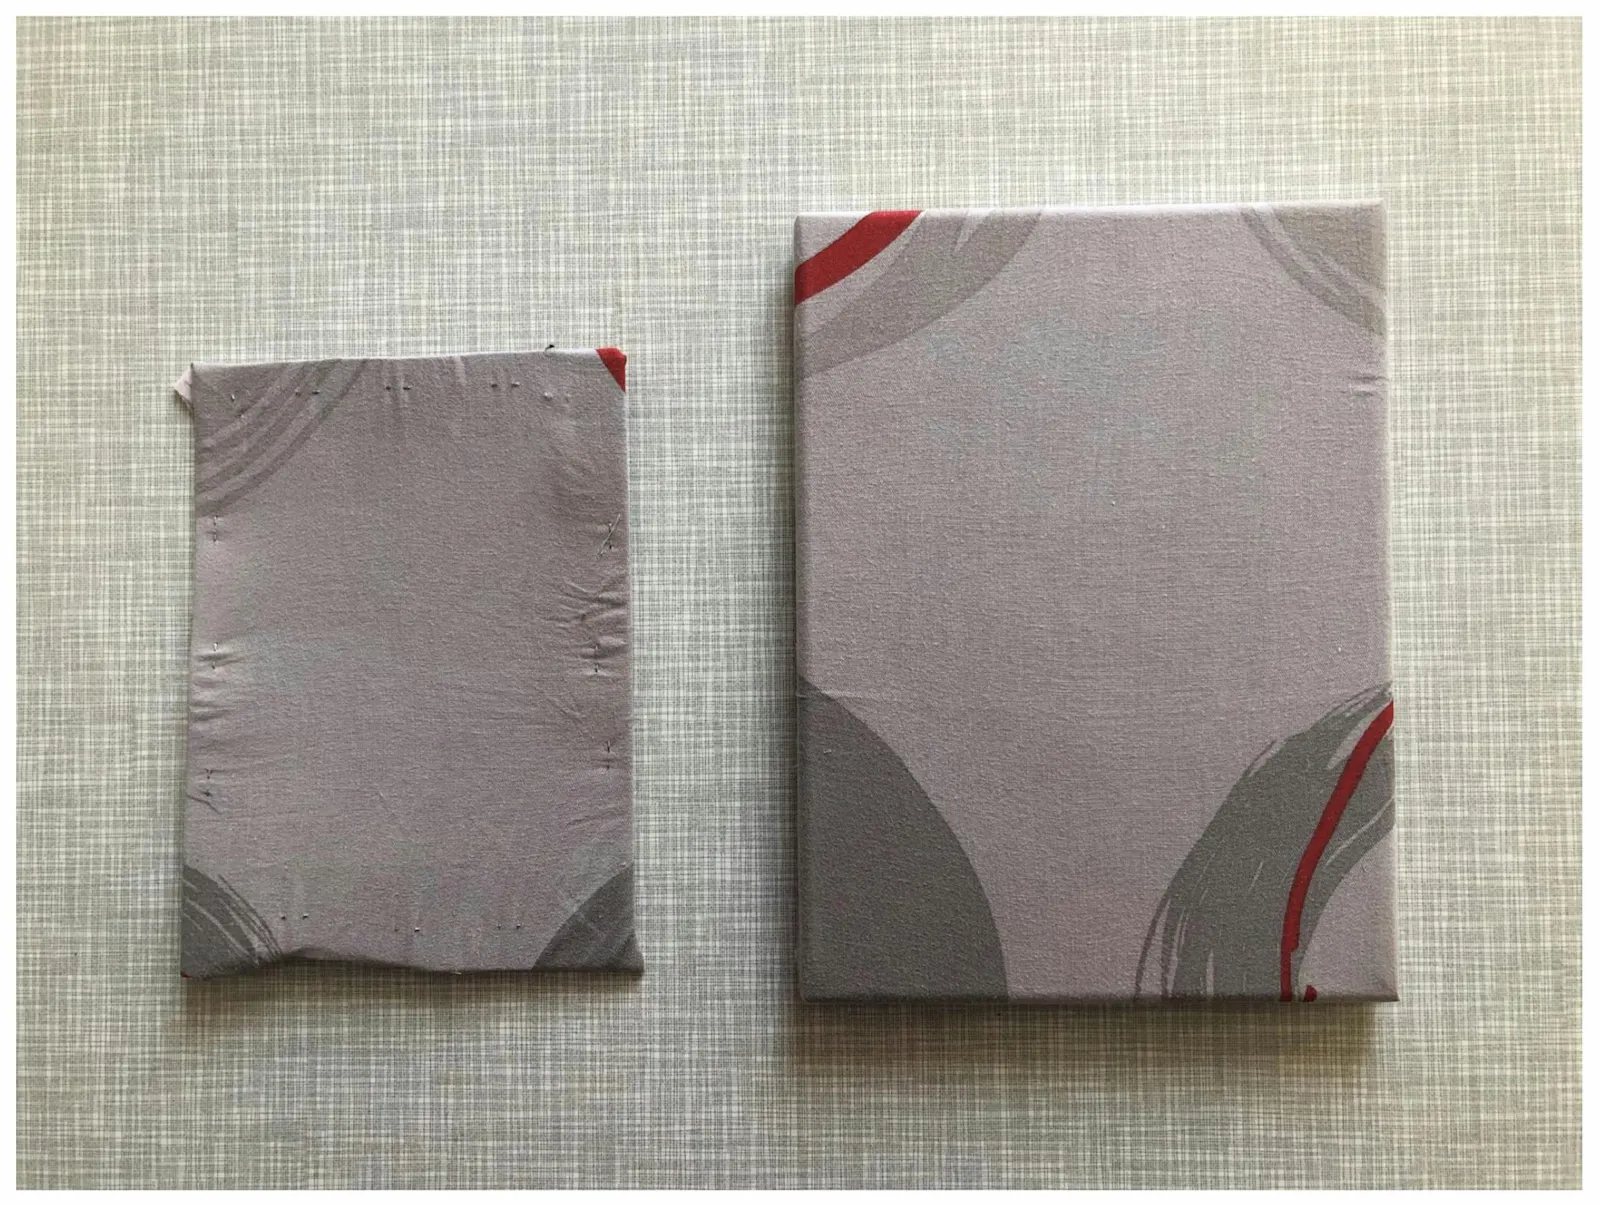
This is what your finished screens should look like. You can now start screenprinting
So sehen deine fertigen Siebe aus. Du kannst sie nun für Siebdruck verwenden.
All works and pictures copyright © 2021 Nita & Mikki